


FAQ
Bluetooth
Bluetooth Compatibility
Connect Bluetooth at the Computer (Windows)
Connect Bluetooth at the Handy, Tablet, etc. (Android)
Connect Bluetooth by Windows CE/Apple and the mobile phone
Driver and Bluetooth
Cable and Accessories
Firmware
GNSS Receiver
Interface and Driver
News
Software
Flight Planner 5.6 von ifos GmbH
Google Earth Pro
GPS-Information (Test and Check)
MTK MiniGPS (Test und Check)
NL-121X oder 122X Sportuhren
NL-456DL und NL-457DL mit TimeMachineX
SIRFDemo (GPS protocols)
uCenter
Compatibility Mode for ublox
uBlox and Change the Baudrate
uBlox-Center A-GPS
ublox-Center Compatibility Mode since ublox 6
uBlox-Center Egnos
uBlox-Center GLONASS or GPS for ublox 7
uBlox-Center Messages
uBlox-Center Update Rate
uCenter Manual
Windows-Linux-Apple-Android
uBlox-Center GLONASS or GPS for ublox 7
Is it possible to receive GLONASS or GPS?
You can receice GPS or GLONASS. The required configuration will described in the following.
61973 Navilock NL-662U USB 2.0 GLONASS GPS receiver u-blox6
61974 Navilock NL-663P MD6 GLONASS GPS receiver u-blox 6
61975 Navilock NL-664P seriell MD6 GLONASS GPS receiver u-blox 6 Outdoor
61976 Navilock NL-682MP seriell MD6 GLONASS GPS receiver u-blox 6 Outdoor Marine
1.Connect the receiver to the uCenter.
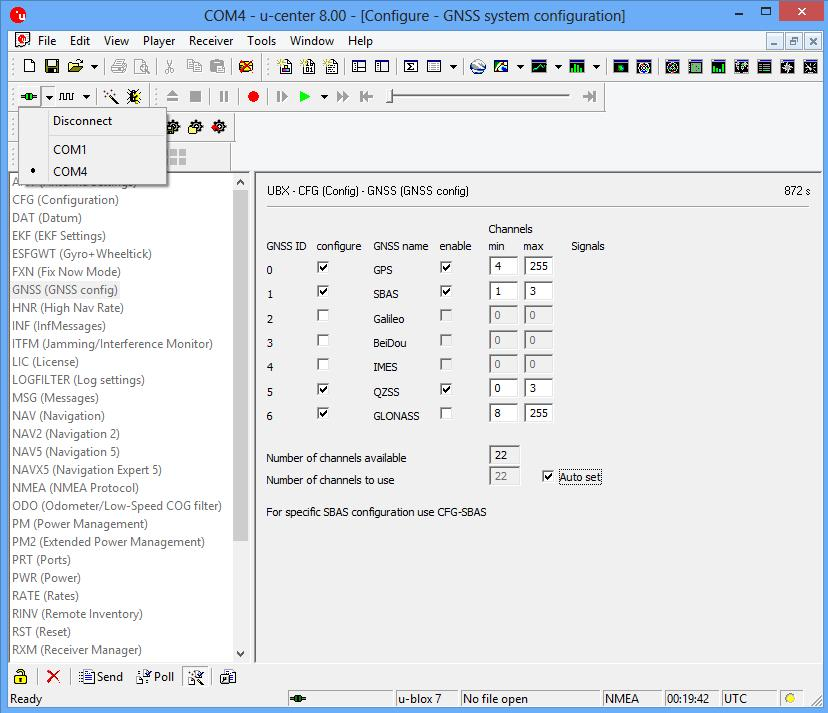
2.Open the "View Configuration View" in the menu.
3. Configure the parameters in the right side of the screenshot.
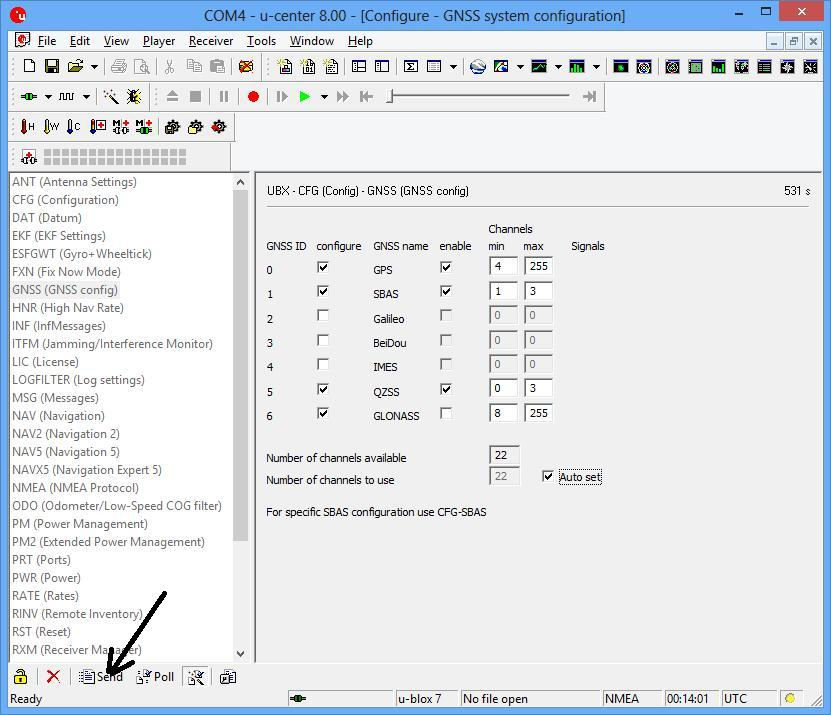
4. Click on "Send".
5. Open "View Configuration View" in the menu.
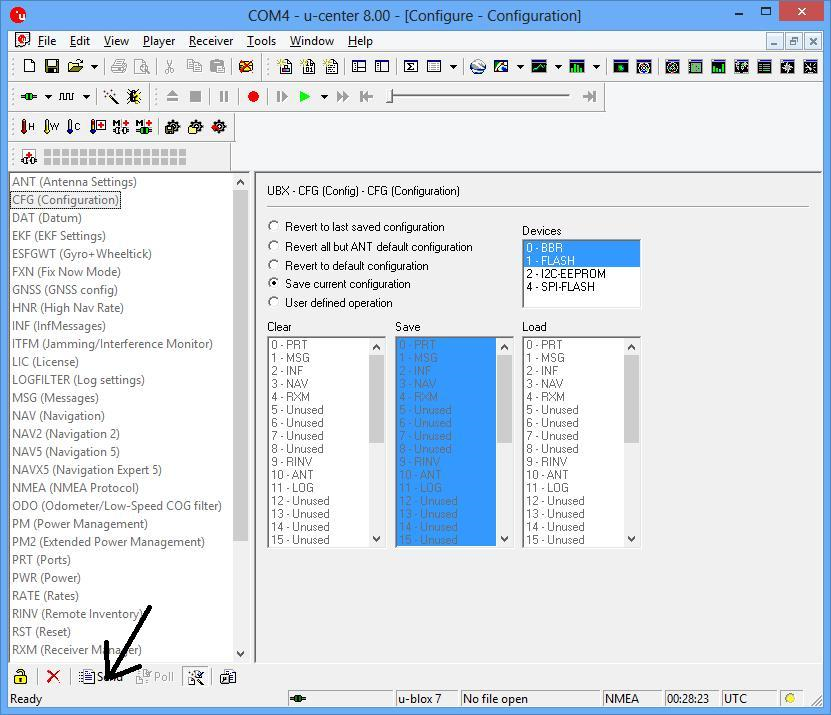
6. Select "Save current configuration".
7. For permanent saving click "Send".
8. Done. The NL-682MP receives GPS.
7. For permanent saving click "Send".
8. Done. The NL-682MP receives GPS.